Thin Plate Spline Motion Modelによる好きな動画から好きな画像へのモーショントレース

この記事では、Thin Plate Spline Motion Modelによって、任意の動画のモーションを任意の静止画にトレースする方法を紹介します。
Thin Plate Spline Motion Modelとは
モデルの構成は下図のとおりです。

まず、トレース元動画(Driving)とトレース先画像(Source)を入力として、BG Motion PredictorがSourceからDrivingへの背景の動きを表すアフィン変換を予測します。同時に、Keypoint DetectorがKセットのキーポイントを推定します。
次に、Dense Motion Networkが、上記の予測結果を入力として、 Optical Flow(オプティカルフロー)とMuti-resolution Occlusion Masks(複数解像度のオクルージョンマスク)を推定します。
最後に、Sourceを入力して、エンコーダで抽出した特徴マップを推定したオプティカルフローでワープし、対応する解像度のオクルージョンマスクでマスクします。
つまり、背景の変化と人の変化をそれぞれ推定し、それらの組み合わせからSource全体をどのように変形すればDrivingに近づくか、という推定と、人の動き部分のマスクの推定を行います。そして、それらの情報によってSourceを変換して動画化することで、モーションのトレースを実現しています。
デモ
それでは、Google Colaboratoryを使って実際に実行していきます。
なお、記事内で紹介したコードをすべて含むノートブックは、以下のリンクから直接参照することができます。
環境設定
はじめに、画面上部のメニューから、「ランタイム」、「ランタイムのタイプを変更」と進み、「ハードウェアアクセラレータ」を「GPU」に変更しておきます。これにより、推論時にGPUを利用することができます。
次に、公式リポジトリのクローンと、必要なライブラリのインストール・インポートを行います。
# リポジトリのクローン
!git clone https://github.com/yoyo-nb/Thin-Plate-Spline-Motion-Model.git
%cd Thin-Plate-Spline-Motion-Model

# ライブラリのインストール・インポート
!pip install imageio-ffmpeg
!pip install --upgrade gdown

import imageio
import numpy as np
import matplotlib.pyplot as plt
import matplotlib.animation as animation
from skimage.transform import resize
from IPython.display import HTML
import warnings
import torch
import os
import gdown
from demo import load_checkpoints
from demo import make_animation
from skimage import img_as_ubyte

warnings.filterwarnings('ignore')
学習済みのパラメータもダウンロードしておきます。
!mkdir -p checkpoints
!wget -c https://cloud.tsinghua.edu.cn/f/da8d61d012014b12a9e4/?dl=1 -O checkpoints/vox.pth.tar
サンプルの画像と動画はGoogle Driveからダウンロードできます(こちらからお借りしたものを含みます)。
url = 'https://drive.google.com/drive/folders/1XRPg76eXhP_gQIhaGXsS6_c4o4DvDe4_'
gdown.download_folder(url, quiet=True, use_cookies=False)
モデル設定
先ほどダウンロードした画像と動画は./assets配下に保存されています。好きな組み合わせを選んで指定します。
device = torch.device('cuda:0')
dataset_name = 'vox' # ['vox', 'taichi', 'ted', 'mgif']
source_image_path = './assets/01.jpg'   # Source画像のパスを指定
driving_video_path = './assets/04.mp4'  # Driving動画のパスを指定
output_video_path = './generated_01_04.mp4'  # 生成動画の保存パスを指定
config_path = 'config/vox-256.yaml'
checkpoint_path = 'checkpoints/vox.pth.tar'
predict_mode = 'relative' # ['standard', 'relative', 'avd']
find_best_frame = False # when use the relative mode to animate a face, use 'find_best_frame=True' can get better quality result

pixel = 256 # for vox, taichi and mgif, the resolution is 256*256
if(dataset_name == 'ted'): # for ted, the resolution is 384*384
    pixel = 384

if find_best_frame:
    !pip install face_alignment
オリジナルのものを利用する場合は、正方形にクロップしたものをcolab上にアップロードし、上記の方法によりファイルを指定してください。
推論
モーションのトレースを行います。
# 画像・動画の読込
source_image = imageio.imread(source_image_path)
reader = imageio.get_reader(driving_video_path)

source_image = resize(source_image, (pixel, pixel))[..., :3]

fps = reader.get_meta_data()['fps']
driving_video = []
try:
    for im in reader:
        driving_video.append(im)
except RuntimeError:
    pass
reader.close()

driving_video = [resize(frame, (pixel, pixel))[..., :3] for frame in driving_video]

# 学習済みパラメータのロード
inpainting, kp_detector, dense_motion_network, avd_network = load_checkpoints(config_path = config_path, checkpoint_path = checkpoint_path, device = device)

# トレースの実行
if predict_mode=='relative' and find_best_frame:
    from demo import find_best_frame as _find
    i = _find(source_image, driving_video, device.type=='cpu')
    print ("Best frame: " + str(i))
    driving_forward = driving_video[i:]
    driving_backward = driving_video[:(i+1)][::-1]
    predictions_forward = make_animation(source_image, driving_forward, inpainting, kp_detector, dense_motion_network, avd_network, device = device, mode = predict_mode)
    predictions_backward = make_animation(source_image, driving_backward, inpainting, kp_detector, dense_motion_network, avd_network, device = device, mode = predict_mode)
    predictions = predictions_backward[::-1] + predictions_forward[1:]
else:
    predictions = make_animation(source_image, driving_video, inpainting, kp_detector, dense_motion_network, avd_network, device = device, mode = predict_mode)

# 結果の保存
imageio.mimsave(output_video_path, [img_as_ubyte(frame) for frame in predictions], fps=fps)

# 描画
def display(source, driving, generated=None):
    fig = plt.figure(figsize=(8 + 4 * (generated is not None), 6))

    ims = []
    for i in range(len(driving)):
        cols = [source]
        cols.append(driving[i])
        if generated is not None:
            cols.append(generated[i])
        im = plt.imshow(np.concatenate(cols, axis=1), animated=True)
        plt.axis('off')
        ims.append([im])
    ani = animation.ArtistAnimation(fig, ims, interval=50, repeat_delay=1000)
    plt.close()
    return ani

HTML(display(source_image, driving_video, predictions).to_html5_video())
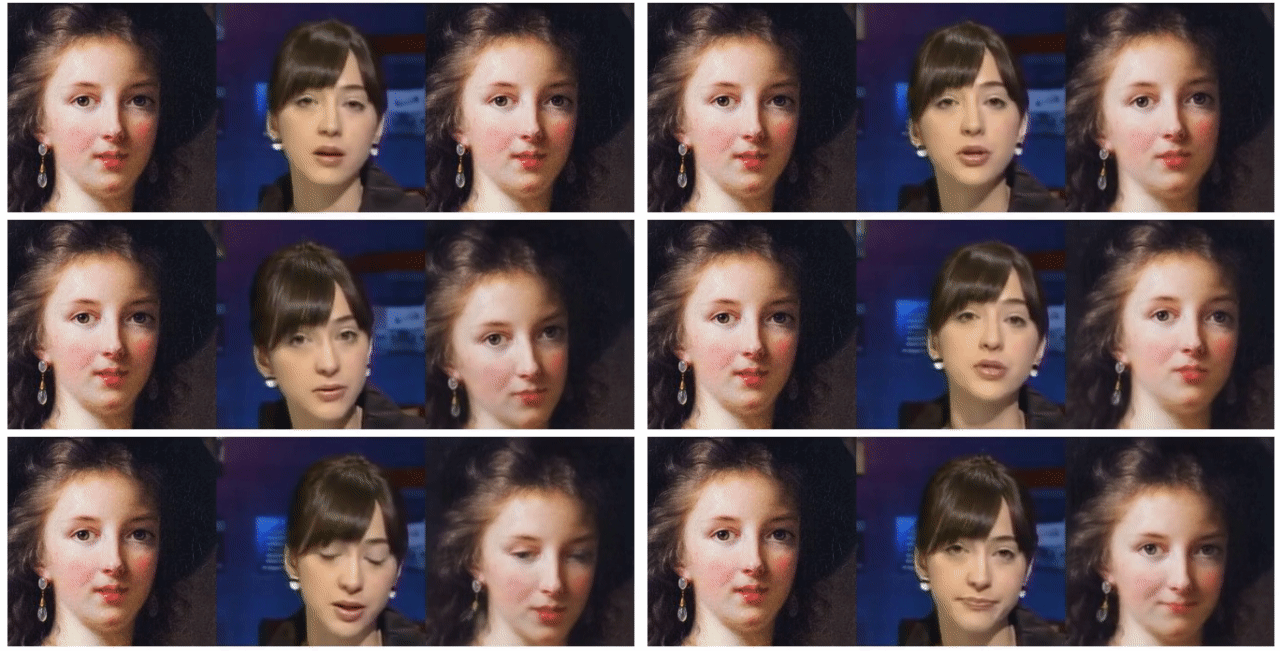
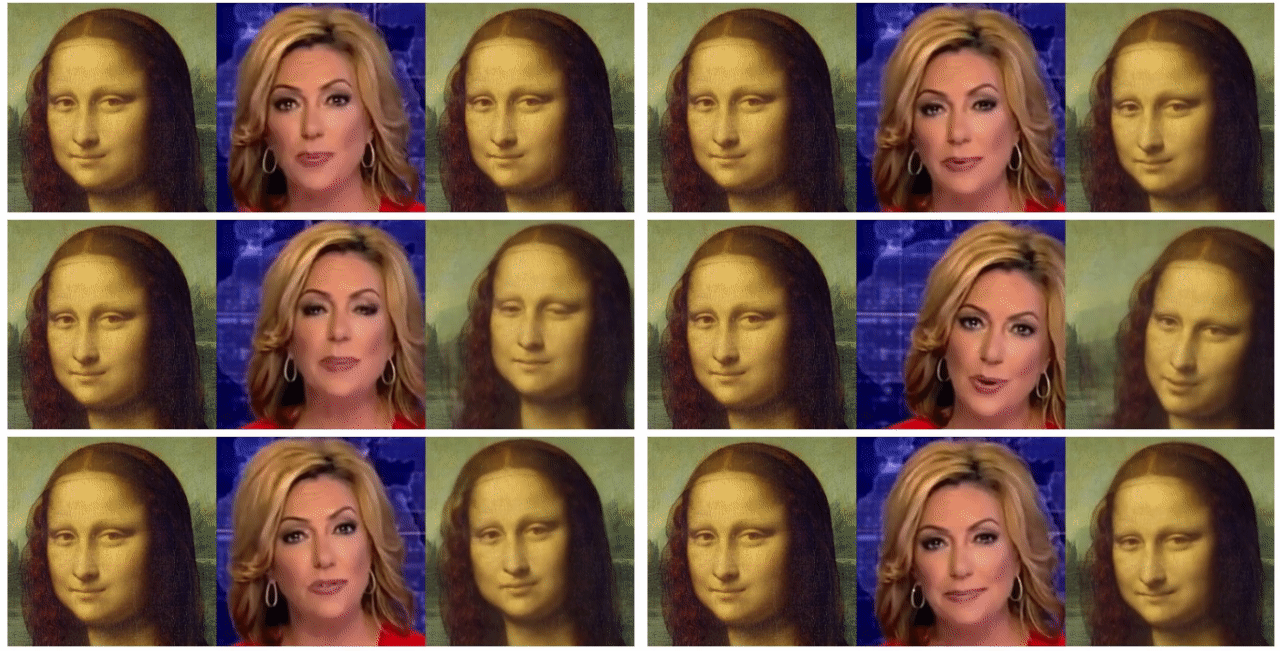
サンプルからいくつかの組み合わせを試してみた結果はこちらです(ブログ用に画質を落としています)。 左がトレース先画像(Source)、中央がトレース元動画(Driving)で、右がトレース結果です。


colabも面倒だよ、という方は、以下のリンクからブラウザ上で簡単に試すこともできます。
まとめ
非常に簡単かつ高速に、クオリティの高いトレースが実現できました。 イラストやCGへのモーション付加など、どのように応用されていくのか楽しみな技術です。


